Printing – Windows Shared Printing

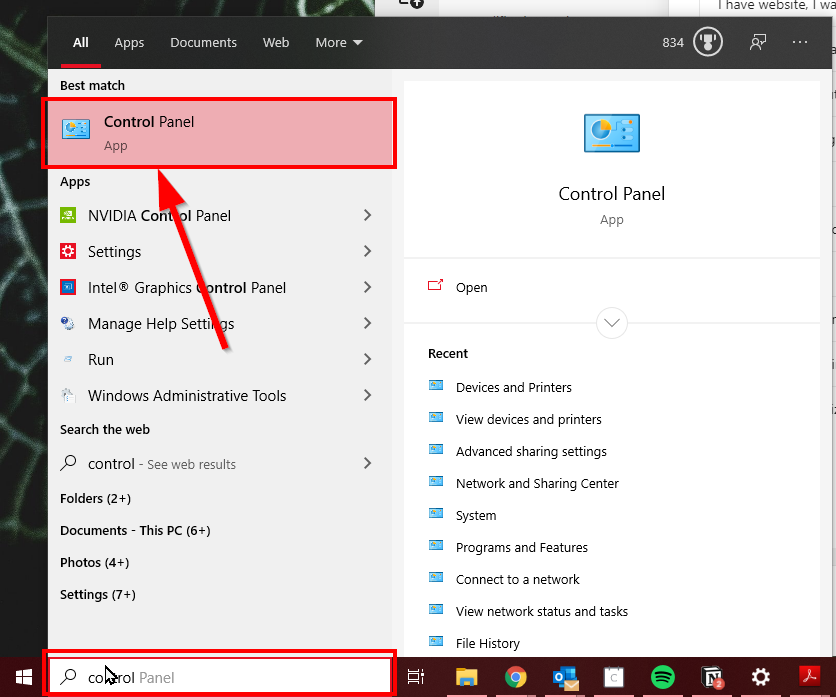
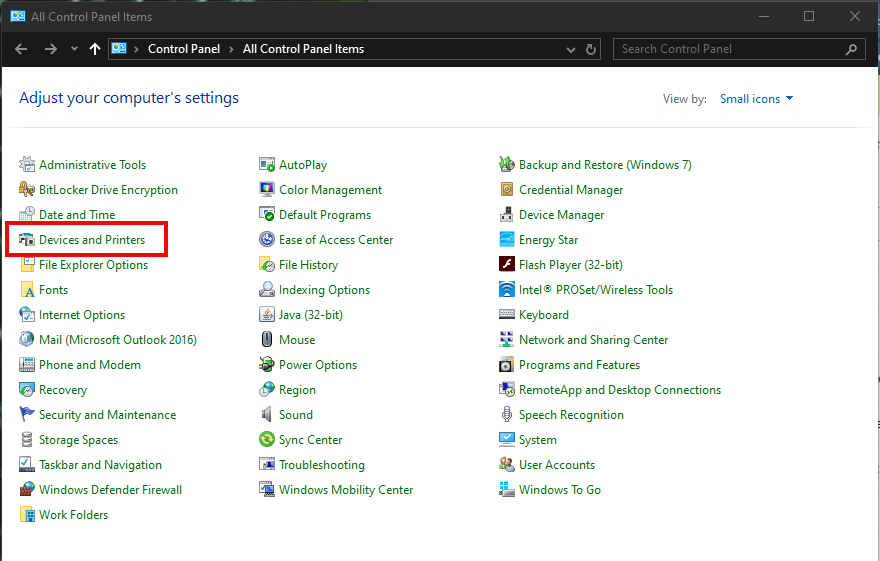
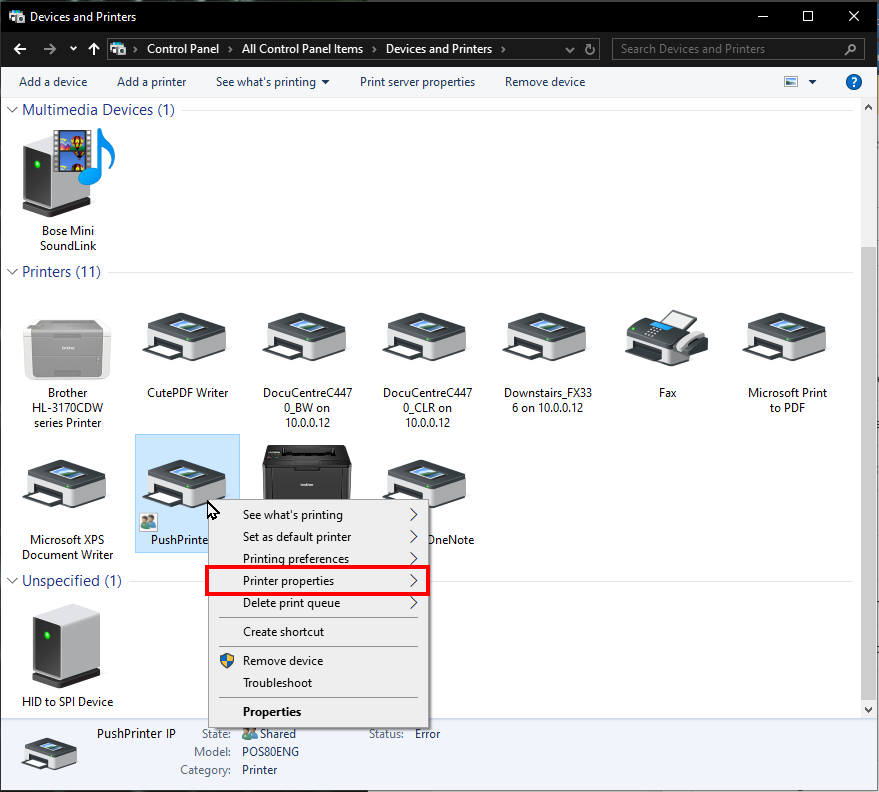
how to guide to connect a USB printer

1. Please go to Windows Control Panel

2. Open Devices and Printers

3. Right click and select ‘Printer Properties’


4. If your printer is not showing use these instructions to set it up Printer Set up.

5. To test that the printer is working, please press Print Test Page

5. If the test page does not print. Then please connect and install the printer correctly. Please see : Printer Set up.

6. If the test page does print, please share the printer with the following settings;


7. Click apply

8. Open the PushPrinter application. Please check that the settings display as follows;

7. Now either ‘Create Printer’ or ‘edit’ your existing printer:


8. Add settings including: API key from the printer just created, ensure printer type is Windows Shared Printer (ESCPOS). Windows shared printer name must match the shared printer name that was added before.


NOTE:

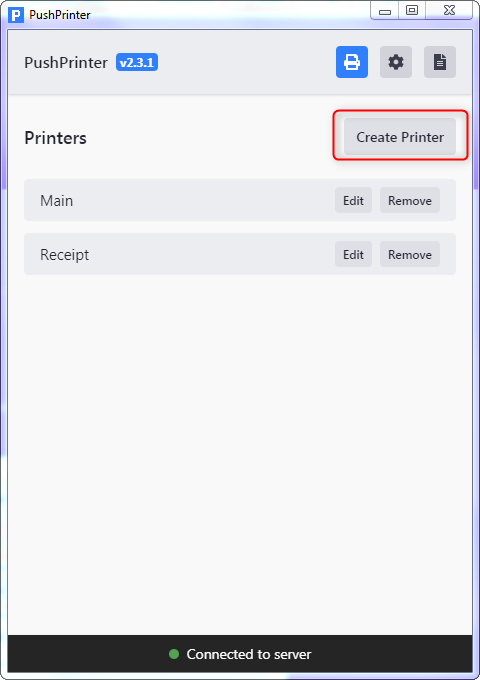
Printer name – This is the name that the printer will show inside of CloudWaitress.

API Key – This needs to be copied from the printer settings inside of CloudWaitress.

Number of copies – This will determine how many copies of the are printed.

Printing type – This needs to be set to Windows Shared Printer (ESCPOS) for this to work.

Windows Share Printer Name – This must match EXACTLY the shared printer name that was added before. You should avoid spaces and special characters.

8. Then press ‘Send Test Print’ and then press ‘Create Printer’.